

How To Create A Skybox In Unity
Fun with Skyboxes
![]()
Creating a Skybox using a Cubemap and adding it to your scene.
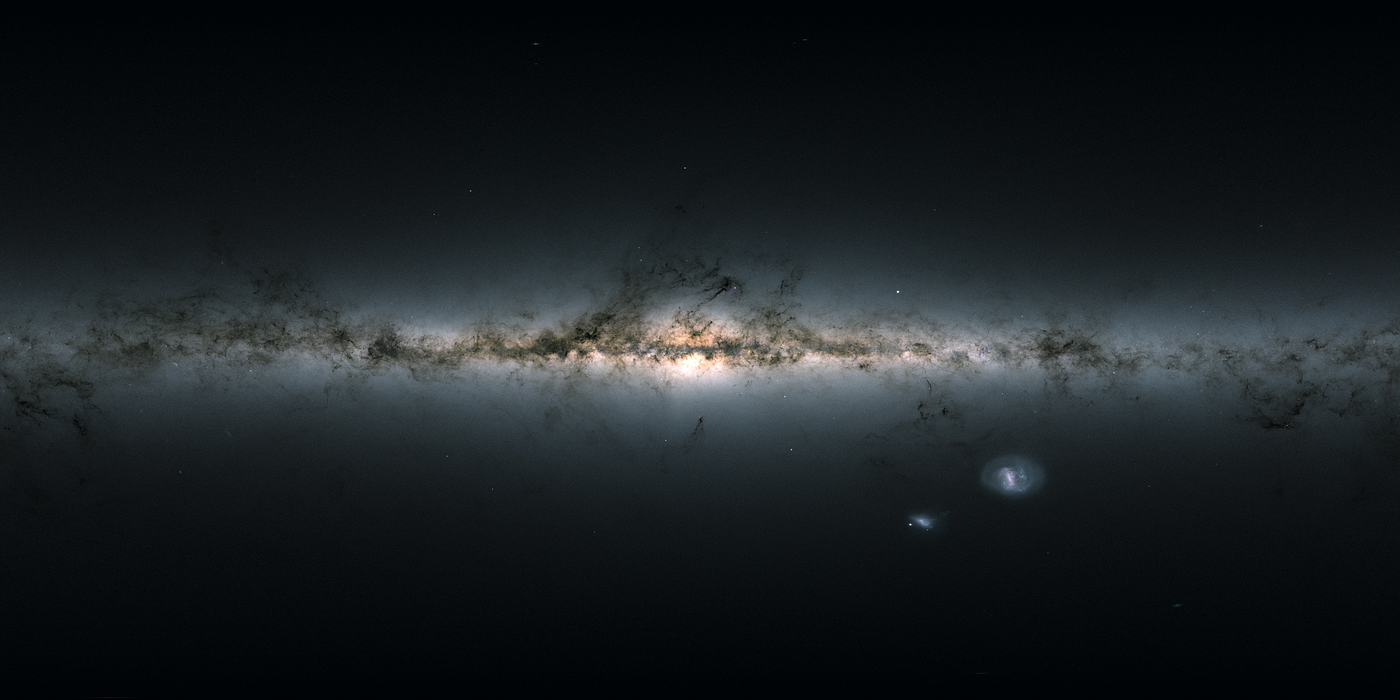
Today we are going to explore adding some cool backgrounds to our 3D games using a Skybox in the Unity Engine. Unlike many walkthroughs, this article is going to walk through the entire process from creation to completion. Note that we are going to do a few things wrong at first, this is intended to show you the results of incorrect setup, at the end I will explain how to fix those issues.
Source Your Image
Locate a high-quality image you want to use for your skybox. I am using one that is 4000 x 2000, the higher quality the image, the better results you are going to have.
Two key rules to making a good skybox are:
- Images should be formatted with the equirectangular projection. NOTE: I purposefully did not use one of these images so that I could show you why it is important later.
- Images should have an aspect ratio of 2:1 (Hence 4000 x 2000).
Once you have your image saved we need to convert it into something usable. If you have the Photoshop skills to do this part then go for it! I will be using Panorama to Cubemap by Lucas Crane on Github. The tool allows us to quickly convert our image to the cubemap that we need.
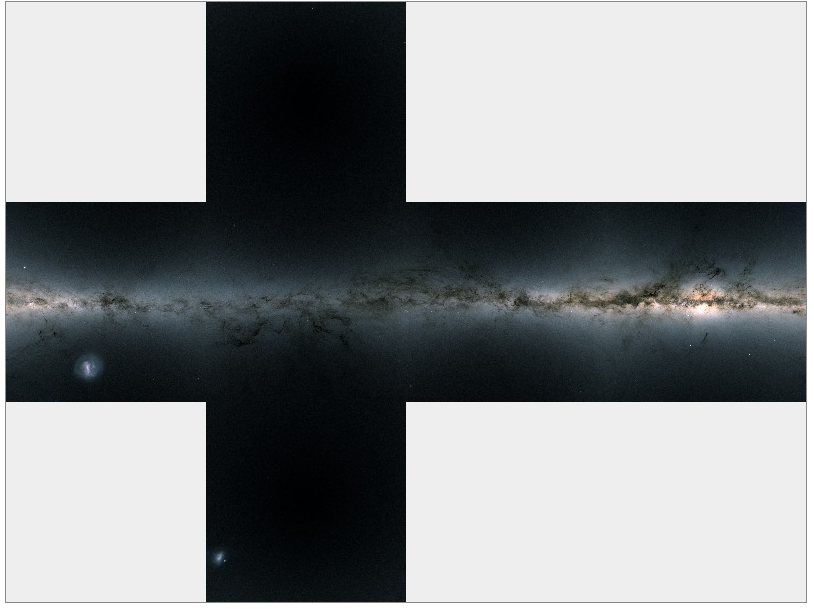
Panorama to Cubemap has several settings, we will set our cube rotation to 360 degrees, our interpolation to Best, and our output format to PNG. Once we upload the image we will see the following result.
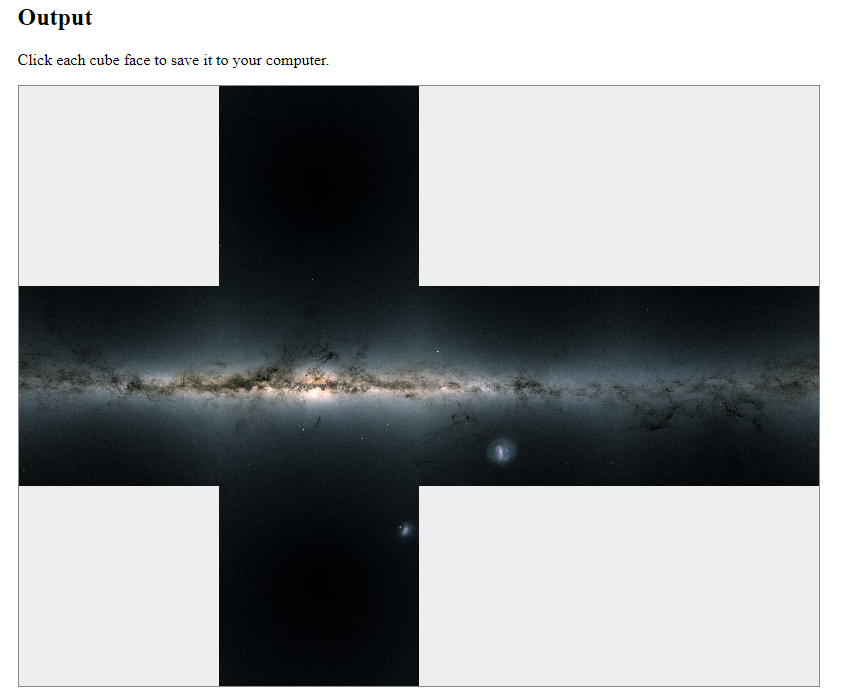
The next part is the simplest of it all. Click on each square to save it to your downloads folder to move into your game later. These files are already named for us but we need to understand how they translate into Unity. You can look at details on supported cubemaps in Unity by reading the documentation.
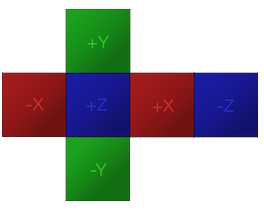
What we are most interested in is the layout that matches our image above. We have what is referred to as the horizontal cross. So our saved files map to a square on the cross:
- nx.png = -X (Left red)
- nz.png = +Z (Left blue)
- pz.png = +X (Right red)
- nz.png = -Z (Right blue)
- py.png = +Y (Top green)
- ny.png = -Y (bottom green)
Now that we have our files and our mapping we can create the Skybox in Unity.
Creating the Skybox
The skybox is just a special type of material in Unity. Like any material it requires setting up the textures and the material for using in our game. So we will do that next.
Open Unity and inside the folder you want to create your materials in right click and choose Create > Material. Then we need to import our images into the game engine. I placed mine into a new folder called textures.
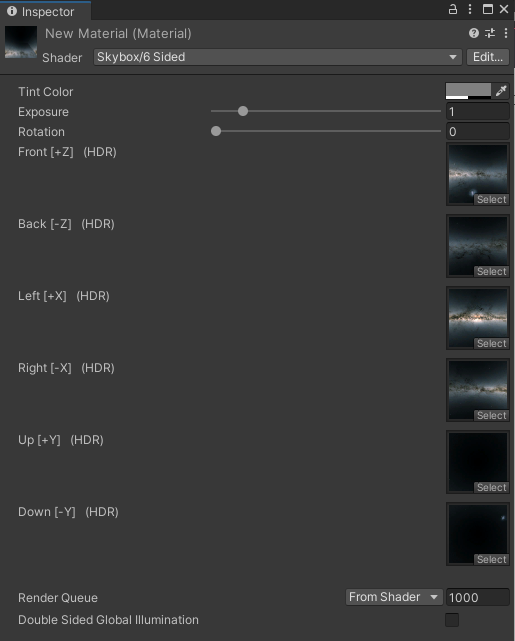
Now in the inspector we need to change our material from a standard material to a 6 sided material.
Notice when we change the material that our inspector options change to a bunch of empty textures, with names matching the horizontal cross layout that we are using.
We can now assign our image textures from Panorama to Cubemap into their perspective locations to finish out the material. We can ignore the other options for now.
Once we have our images added our material should look something like this.
Ok, so we've built ourselves a neat skybox to add to our game but how do we actually use it? Well lets open the Lighting Window (Window > Rendering > Lighting)and go to the Environment tab. Now we can set new Skybox texture to be used our games background.
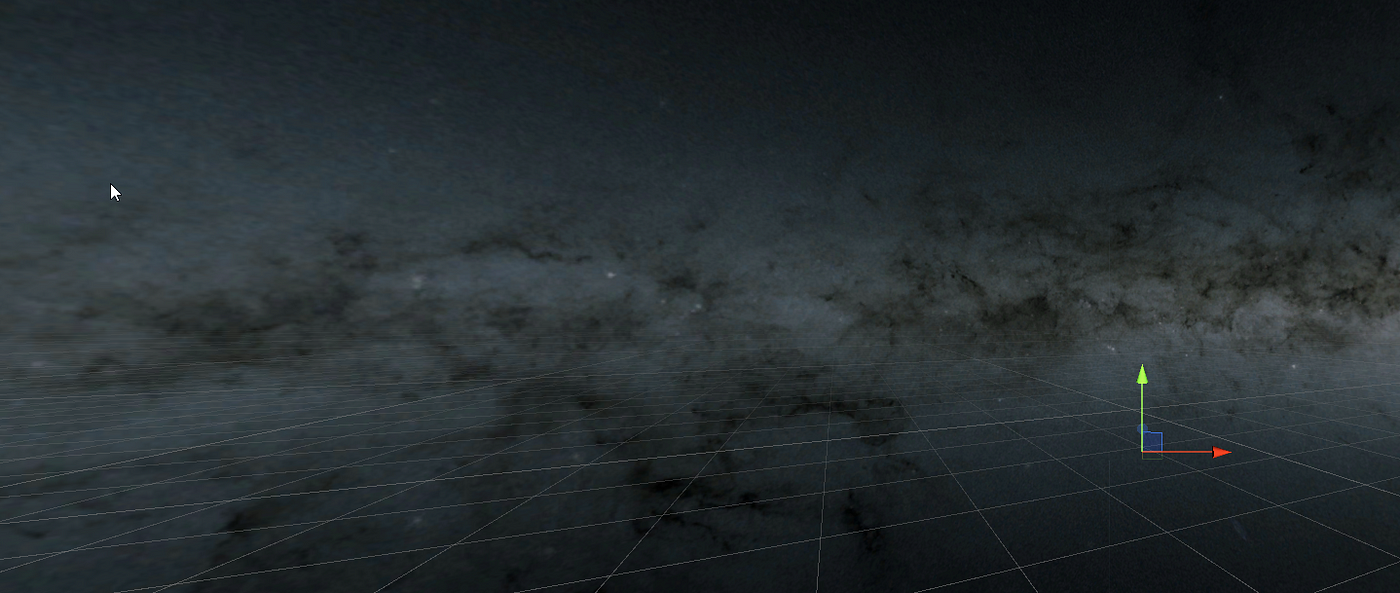
And there we go, brand new skybox in our scene! Now I used the image above because I wanted to show what not using a equirectangular projection could cause.
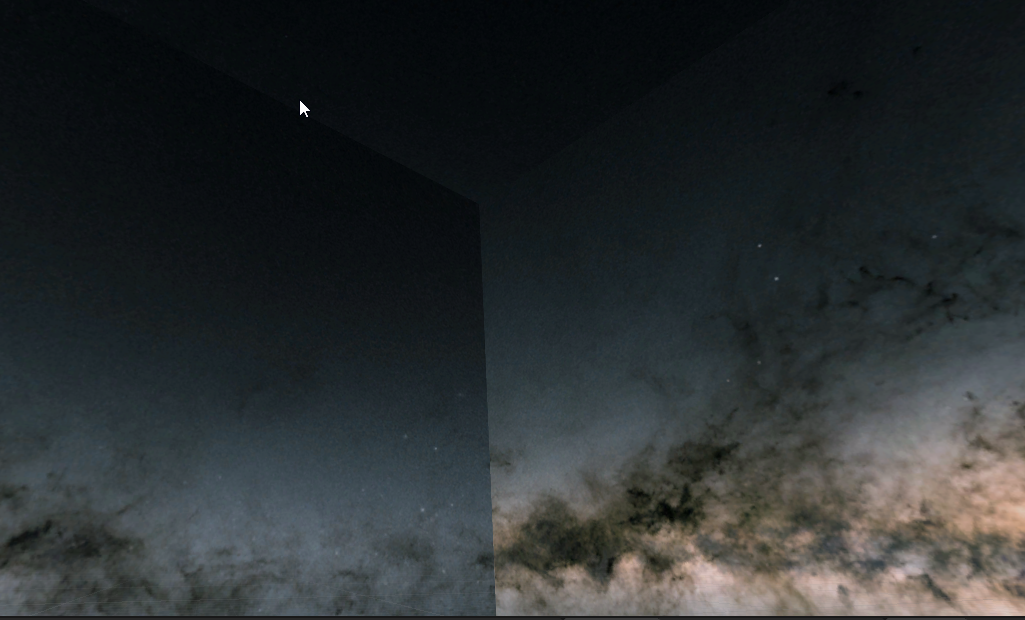
That is what can happen when we don't use the right kind of image. We have visible seams in our skybox. The might be something we could hide with creative game design but it is better to deal with it from the start so we don't need to get creative to hide our flaws. We set our rotation to 360 earlier because that was what most people would intuitively think to choose for a 360 degree background, however if we choose 180 instead we get a set of images that have a more clean seam.
Using the 180 Rotation instead of 360 will eliminate almost all of the seam issue we saw above.
Other Fixes
If you are a Photoshop user you can also fix this using the 3D tools. One of which is to make a Spherical Panorama. Using that and the Offset filter I was able to achieve this seamless final product.
Until Next Time.
How To Create A Skybox In Unity
Source: https://levelup.gitconnected.com/fun-with-skyboxes-dd28ebaef48c
Posted by: hillwashis.blogspot.com
0 Response to "How To Create A Skybox In Unity"
Post a Comment